Creating 3D printing molds
Function of the Raspberry Pi 3 and ESP32
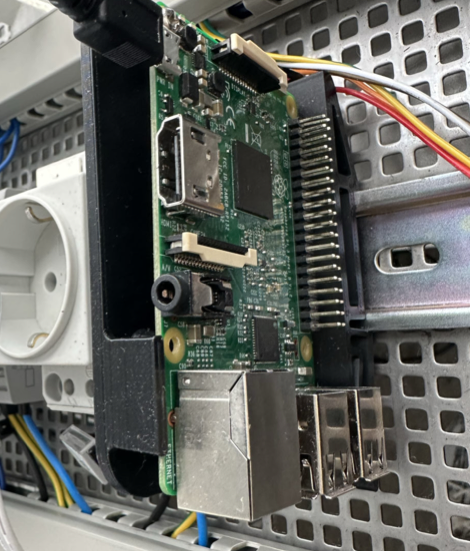
The Raspberry Pi 3 is used in the project for the operation of Home Assistant. Home Assistant is loaded onto the Raspberry Pi 3 and can be accessed and used through it. In Home Assistant, all products from Homematic IP are integrated, allowing them to be controlled, and data to be captured and processed.
The ESP32 controls the heating system. It receives measurement values from the light sensor on the thermostat and, based on that, either heats up to reach the setpoint or turns off the heating once the setpoint is reached. The heating system is controlled by the ESP32 through a MOSFET.
Mounting Bracket for Raspberry Pi 3
After creating the circuit diagrams, attention was given to finding a way to securely mount the Raspberry Pi 3 on the perforated board. Ultimately, a decision was made to use a bracket that attaches the Raspberry Pi 3 to the DIN rail. This solution allows for flexibility in adjusting the position of the Raspberry Pi 3 and easily adapting to any future changes without requiring a new bracket. A suitable bracket was found on the "Thingiverse" website and modified to fit the required dimensions and printing specifications using the "Shapr3D" software. Additionally, a holder for the buttons was created in "Shapr3D" with a focus on ensuring it could be securely fastened to the perforated board to prevent any movement or detachment during transportation. Once the modeling was completed, the 3D models were sliced using the "Ender Creality" software for the 3D printers. The 3D models were printed using PLA plastic, ensuring that there is no conductive connection between the Raspberry Pi and the DIN rail. This design choice provides protection to the Raspberry Pi in case of any fault currents, preventing any potential damage.
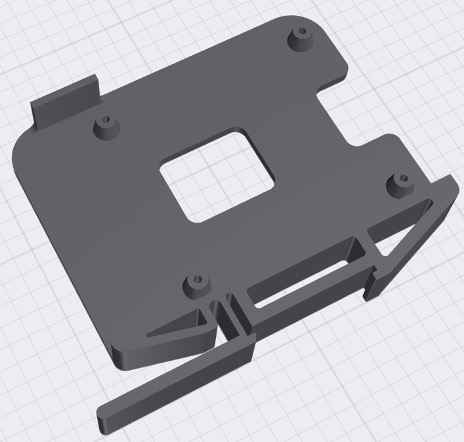
Figure: Mounting Bracket for Raspberry Pi 3, Fabio Bock
Bracket for the Thermostat and ESP32
Subsequently, several 3D printing molds were designed using Tinkercad. Initially, a mold was created to be screwed onto the thermostat, allowing for the insertion of the LED and light sensor. Another 3D-printed component, acting as a counterpart to the thermostat holder, shields the sensor from ambient light, avoiding any interference caused by external lighting. Finally, a mold for the ESP32 housing and breadboards was designed and printed. The ESP32 is inserted into the mold, and through drilled holes in the housing, jumper cables can be connected to sensors or other components from the outside.
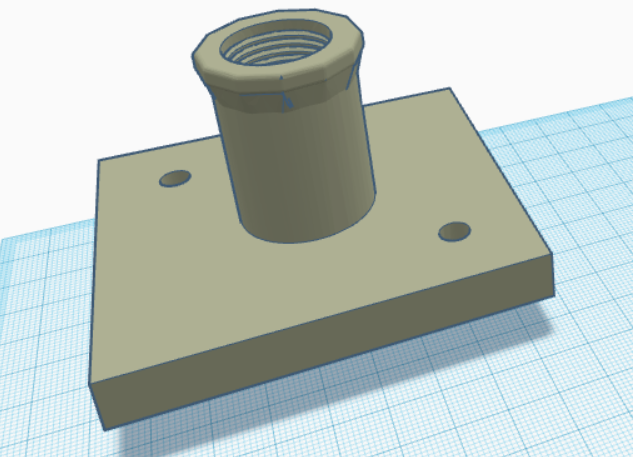
Figure: Thermostat holder, Julius Krumpen